感谢Matteo Curcio,提供的final cut pro x的快捷键。
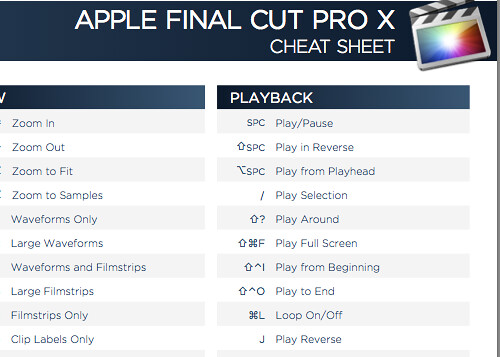
下载地址:http://yunpan.cn/Q4avMCDyBbqjd (访问密码:8478)
文章出自finalcolor.net,转载请注明出处,谢谢!
感谢Matteo Curcio,提供的final cut pro x的快捷键。
下载地址:http://yunpan.cn/Q4avMCDyBbqjd (访问密码:8478)
文章出自finalcolor.net,转载请注明出处,谢谢!
before:
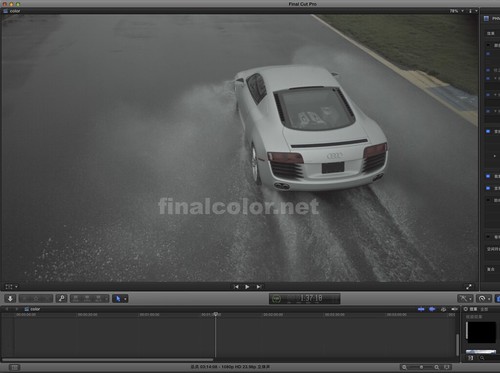
After:

文章出自finalcolor.net,转载请注明出处,谢谢。
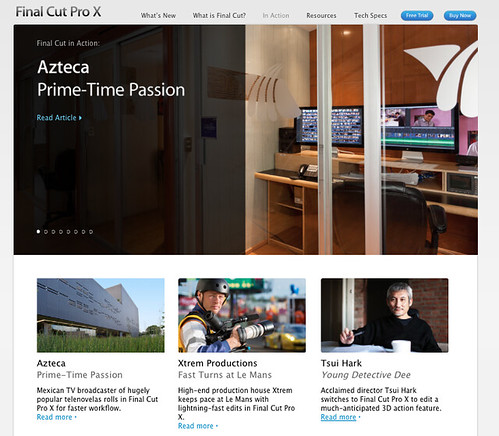
Final Cut Pro X的实际运用又添代表性的案例,继剪辑《狄仁杰之神都龙王》之后,Azteca公司(每年生产大量的接近10000小时电视剧和节目)从final cut pro x的同步性,编辑的快速性(在采集的过程中就可编辑),可立即预览的效果,无需等待渲染,用Motion开发fcpx的模版,滤镜等等获得了很大的帮助。
看来剪辑师要准备好迎接final cut pro x 10.1的更新了!
文章出自finalcolor.net,转载请注明出处,谢谢!
Blackmagic Design 宣布为自己的数字电影摄像机 发布4K 采集产品 和 镜头
UltraStudio 4K features full resolution 4K support, dual stream 3D capture/playback, 10bit hardware architecture, dual link 3 Gb/s SDI, support for up to 1080p60 in SDI, component analog and HDMI connections which support full SD, HD, and 4K.
“UltraStudio 4K is the best way to get high resolution 4K, advanced 3D and 4:4:4 capture and playback, in a professional rack based design that everyone can afford.”
We think this an amazing piece of kit for the price, maybe the only thing lacking is a Thunderbolt pass through which means it will have to be and end of chain device.
UltraStudio 4K Key Features
Dual Link 3G SDI (3 Gb/s SDI) connections, supports SD, HD up to 1080p60, 2K and 4K.
SDI inputs include full SDI re-clocking for capture from poor quality SDI sources.
HDMI in and out, supports SD and HD formats up to 1080p60, frame packing 3D and 4K.
Component analog in and out.
Component analog switches to s-video and composite.
2 channel balanced analog audio in and out. Additional RCA HiFi audio in.
2 channel AES/EBU unbalanced audio in and out.
Timecode in and out on XLR connectors
Genlock/tri-sync input.
Sony™ compatible RS-422 deck control.
Supports uncompressed 810 bit and compressed video capture and playback.
Supports 4K playback using new Dual Link 3 Gb/s SDI connections and HDMI.
Capture/playback of side by side, line by line, top and bottom and frame packing 3D via HDMI.
Capture/playback of side by side, line by line, top and bottom and dual stream 3D via SDI.
Includes hardware up down and cross conversion on playback.
Includes hardware SD and HD keying.
Compatible with Mac OS X computers with Thunderbolt™.
Supports Final Cut Pro X , Adobe® Premiere® Pro CS6, Adobe® Photoshop® CS6, Adobe ® After Effects® CS6 , DaVinci Resolve 9 and more.
Includes free developer SDK.
Includes free DaVinci Resolve Lite and Media Express capture and playback software.
文章出自finalcolor.net,转载请注明,谢谢!
在Motion 4里轻易画出光线,只需一笔!如果你有Wacom手绘板,会更自由。请看下面的视频!
视频:

We’d be lying if we told you we didn’t like the Dashboard and the multitude of widgets that it uses. The problem is if your Dashboard looks anything like ours (read way too many widgets to count) quite a bit of system memory is used to run those widgets.
Well, many people’s first thought is to close the application to reclaim that memory. Guess what? You can’t quit the Dashboard! Well, not in the conventional sense anyway. Here are two ways to kill the Dashboard application, one easy and one geeky.
1 There are a couple applications on the market that let you kill the Dashboard application. A simple one is called Disable Dashboard Utility (do a search on versiontracker.com). It’s really two small applications; one to deactivate and one to enable the Dashboard.
2 If you’re an uber Unix geek you can also kill the Dashboard by opening up the terminal and typing the following commands:
To turn Dashboard off type:
Defaults write com.apple.Dashboard mcx-disabled -boolean YES
To turn Dashboard back on type:
Defaults write com.apple.Dashboard mcx-disabled -boolean NO
3 For either of these commands to take effect you have to restart the Dock by typing: killall Dock
When you have Macbook Pro 15,resolution can not reach to minimun resolution.We should:
1.Close Davinci Resolve
2.Open Terminal
scale Davinci Resolve interface:
defaults write -g AppleDisplayScaleFactor 0.85
Normal:
defaults write -g AppleDisplayScaleFactor 1
3.It’s over.
Enjoy it!HAHA.


 Why do different color wheels in different pieces of software and applications act differently?
How does that answer effect our approach to color grading?
Those two thoughts came to the top of my mind when reading Oliver Peter’s excellent post, Grading with Color Wheels. Why don’t you head over there and read that post? It’s very informative and helps build the foundation for this post. I’ll wait…
Understanding how the color wheels in your NLE process the image has a huge impact on how you approach your color correction. In this post we’ll build out the concepts introduced in Oliver’s article to give us a working methodology.
First, let’s look at Final Cut Pro’s 3-way Color Correction plug-in. I’ll do the same thing Oliver has done. But since my shot has some pretty obvious highlights – for the sake of this example I’m going to drag the highlights and make them blue. Below is the Before / After images. I want you to pay particular attention to the brightest highlights in the waveform monitor.

I’ve noted the highlights with the yellow arrow. But also take a look at the midtones and near the blacks. You’ll notice the waveform is identical. It hasn’t moved a smidgen. Try this yourself with your own footage and with the scopes open. Concentrate on the Waveform Monitor. You’ll notice that no matter how hard you push the wheels – the waveforms in FCP stay rock solid. I’m going to explain in a minute what this means to us as colorists (and why).
But first, let’s move to Apple’s Color and take a look at the same image – with a much milder push toward blue – and again, examine the highlights.

Again, I’ve noted the highlights with the yellow arrow. I’ve done a much much milder blue push, and the waveform is significantly different. In fact, if you do this with your own footage in Color, you’ll see the waveform bounces all over the place as you push and pull your color wheels.
What’s the difference between the Color Wheels in Final Cut Pro and Apple’s Color?
In two words: Math. Audience.
It all starts with Audience. Final Cut Pro is primarily designed for television and television codecs. It works in YUV* color space. In English, this means the underlying image is processed first as brightness values (Y) and then the color values (UV) are derived with some math that use the Y value as a component in that math.
Said even more simply, current video codecs are built upon a simple fact from the early days of television: All color broadcasts needed to be backward compatible with black and white television. This was accomplished by grafting the color information (UV) onto the existing black and white (Y) signal. Thus – today in Final Cut Pro (and any other YUV-based color correction system), pushing and pulling your color wheels have zero effect on the brightness of the image… but the brightness values have a huge effect on color.
Apple’s Color was built for film colorists and film workflows which are RGB workflows and use RGB codecs. Notice, there is no Y component in RGB. Each channel in RGB has brightness values built directly into it. Thus, the underlying math for taking a Lime Green image and pushing it around can result in the image getting darker and brighter depending on how far towards, say, Orange (or any other color) you start to push it. In RGB systems, how reactive brightness is to color changes depends on the underlying math the software programmers are using.
4 ways to put this color theory into action
How can we use these facts to our advantage? I’ve thought of four:
1.In Final Cut Pro – Your initial corrections should begin with brightness, then make hue/saturation corrections, then tweak both as necessary. Again, since color information is partly derived from the Y values, any changes you make in contrast will have big impacts on color. Conversely, once contrast is set – pushing and pulling the color wheels will have zero impact on brightness. So, in FCP – First brightness, then color, then massage as necessary.
2.In Color – There are no set rules. RGB light mixing is a dance. It’s one reason why an outboard control surface is so useful in Color, the dance is much easier to manage and more intuitive.
3.In Color – Often, if you have to fix footage with massive color balance issues and can’t get the luminosity you want with the chrominance you desire because of noise, try bouncing out to FCP and see what the 3 Way Color Corrector filter gives you. It has saved me on more than one occasion. I can often boost Y pretty massively without introducing nearly as much color noise as I would in Color.
4.Whenever you get a new color correction plug-in or on a new piece of color correction software – push the color wheels around while paying attention to your waveform. This will give you a good idea if the underlying math is YUV or RGB and inform you as how to best proceed with your initial corrections.
I hope this helps.
文章出自finalcolor.net,转载请注明,谢谢!


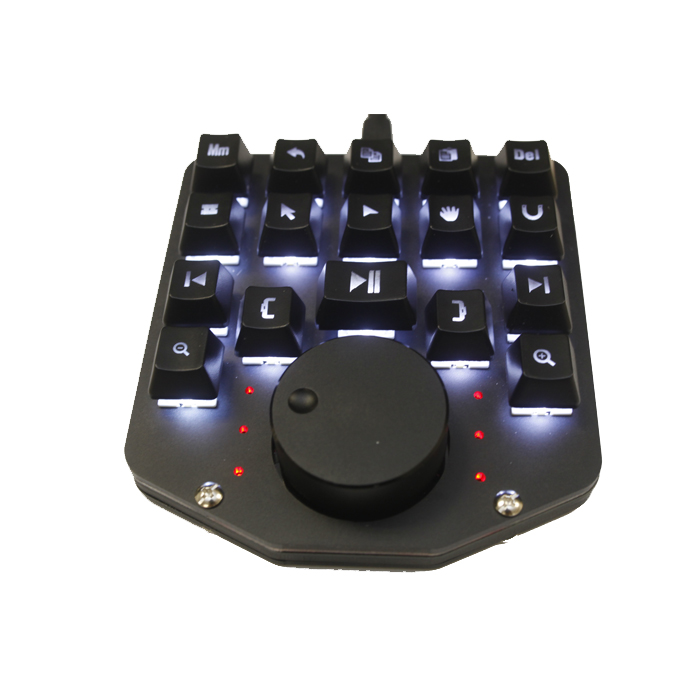 点击链接购买 https://shop35439232.taobao.com/index.htm
观看高质量的专业教程,用户自由选择通过微信或者支付宝的方式进行支付,感谢每一位朋友的支持
支付宝收款:

微信收款: